


646 | ManagementAccess DellPowerConnectW-SeriesArubaOS6.2 | User Guide
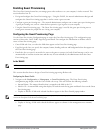
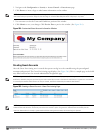
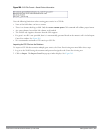
Figure 261: Guest Provisioning Configuration Page—Page Design Tab
2. Enter the filename which contains the company banner in the Banner field. Or, click Browse to search for the
filename
NOTE: Best practices is to use a logo or banner image that is 600 x 100 pixels (width x height). The WebUI does not apply the size
restrictions when you upload an image file, but the image is resized to 600 x 100 pixels when it displays or is printed.
3. Enter the label for the guest listing (the one you used in the Guest Fields tab) in the Text field.
4. Enter the hex value for the color of the text in the Text Color field. The text in the header of the guest listing
displays in this color.
5. Enter the hex value for the color of the background in the Background color field. This determines the color of
the header of the guest listing.
6. Click Preview Current Settings to preview the Guest Provisioning page while you are designing it.
7. To save changes, click Apply.
Configuring Email Messages
You can specify an email to be sent to the guest or sponsor (or both). Email messages can be sent automatically at
account creation time or sent manually by the network administrator or guest provisioning user from the Guest
Provisioning page at any time.
1. Specify the SMTP server and port that processes the guest provisioning (also known as guest access) email. You
can complete this step using the WebUI or CLI commands:
n "Configuring the SMTP Server and Port in the WebUI" on page 646
n "Configuring an SMTP server and port in the CLI" on page 647
2. Create the email messages. Complete this step using the WebUI:
"Creating Email Messages in the WebUI" on page 647
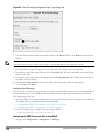
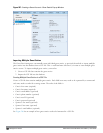
Configuring the SMTP Server and Port in the WebUI
1. Navigate to the Configuration > Management > SMTPpage.