


Configurator
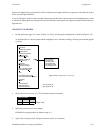
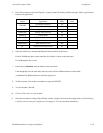
Network Description Table
5−29CM 4000 Installation and Operating Manual
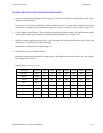
5. Press TAB to advance to the board Type box. A pop−up menu will list the possible board types. Select a type based on
hardware and application:
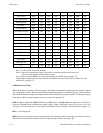
Board
Application
“Type”
Entry
Notes
CM 4000
AccuSwitch processor AS
JupiterXPress (“Snowbird”) processor SB
Saturn AAP Analog audio processor AA
Saturn AVP Analog video processor AV
Saturn CP Control Panel CP
Saturn DAP Digital audio processor DA
Saturn DVP Digital video processor DV
Saturn HDVP High definition video HD
PC Software control panel suite PC
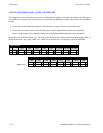
6. Select the Address box and enter the Ethernet hardware address for the board.
For the CM 4000 and other system controllers, the address is shown on the back panel.
Use the Backspace key to erase.
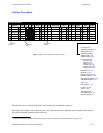
7. If the board is redundant, enter the address of the second unit.
Even though they have the same name, the two boards will have different addresses on this table.
A redundant CM 4000 installation is described on page 2−8.
8. To delete a board, click on the row number box and press DELETE.
9. To close the table, click OK.
10. Click on “File > Save” to save the table.
11. Select the next table for editing. When finished, validate, compile, and activate the configuration set. (See Validating,
Compiling and Activating the Configuration Set on page 5−13 if you need more information.)