


JNS Remapping
16−4 CM 4000 Installation and Operating Manual
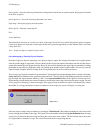
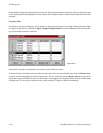
Remapping
When Remap is selected, the system will check to make sure that the old physical number(s) are valid, then it will check to
make sure that the new physical number(s) are available by checking the Switcher Description, the Switcher Input or Output
tables, and the Input or Output Exception tables.
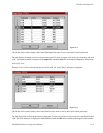
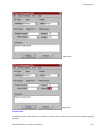
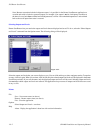
If the physical numbers are valid, the system will display the following confirmation dialog box:
Figure 16−5.
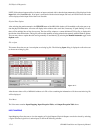
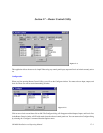
Select Proceed or Cancel. If you elect to proceed, the information will be saved in the Input or Output Exception tables. These
tables serve to map old physical inputs or outputs to new ones. The updated table will then be sent to the VM 3000 controller
boards. Changes are effective immediately. If you select cancel, the system returns to the remap window with no changes
made to the system or exception tables.
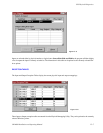
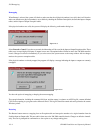
If the physical numbers are already mapped, the program will display a message indicating the inputs or outputs are currently
remapped:
Figure 16−6.
You have the option of remapping or keeping the current mapping.
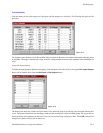
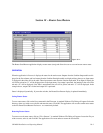
The remap information, including the comment field, date, and time stamp, is written to an ASCII log file, comma delimited
CSV file for exporting to a program such as Microsoft Excel. This log file should be named and can be printed to the current
Windows printer.
Restoring
The Restore button removes a mapping from an Exception table and remaps the number to its original number from the
Switcher Input or Output table. This new table is then sent to the VM 3000 controller boards. Changes are effective immedi-
ately. The user is prompted for confirmation as above prior to any changes taking place.