


Configurator
CP Override Set
5−97CM 4000 Installation and Operating Manual
DEFINING OVERRIDES
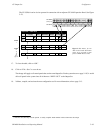
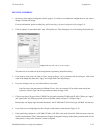
1. On the top of the Jupiter Configurator window (page 5−2), check to see whether the configuration set you want to
change is selected for editing.
For more information, please see Modifying and Downloading a System Configuration Set on page 5−8.
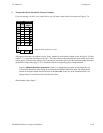
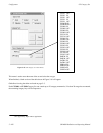
2. Click on “Jupiter > Control Panel Sets,” then “CP Override set.” This will display a list of all existing CP Override sets.
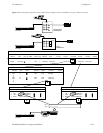
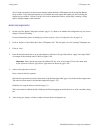
Select Override Set
Figure 5−79. Override edit set menu (example).
The menu lists all override sets in the configuration set presently selected for editing.
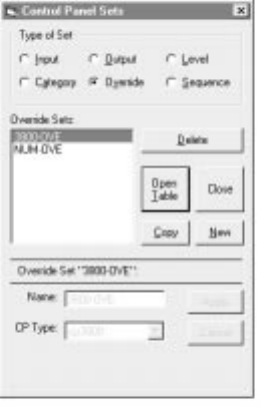
3. If you want to create a new set, click on “New,” and go to Step 4. Or, if you want to edit an existing set, click on the
name of the Output Set; then click “Apply” and “Open Table” and skip to Step 6.
4. If you are creating a new set, you will be asked for a set name.
Note: Do not use the same name for different CP sets. Also, do not name a CP set with a name used by the
system for a Device Type. Device Type names are shown on page 5−108.
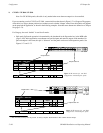
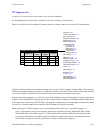
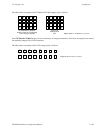
5. Click on one of the CP types. Select “CP3000” for all panels except the CP 3800, and CP 3824. Clicking on “Apply”
and “Open Table” will bring up a blank version of the table shown in Figure 5−78. Skip to Step 7.
Because they can display eight−character mnemonics, the CP 3800 and CP 3824 all use type “CP3800” override sets.
6. If you click on an existing Input Set, this will open a table similar to that shown in Figure 5−78.
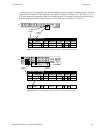
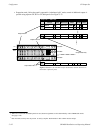
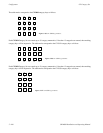
7. If the panel being configured is a CP 3000, CP 3800, or CP 3824, click on the “Override” field and create a name for
the first override button. This is the name that will appear in the panel’s display window during override mode. For all
other panels, no entry in the “Override” column is required.