11-30
COPYRIGHT
©
1999 CANON INC. CANON imageRUNNER 600 REV.1 JAN. 2000 PRINTED IN U.S.A.
CHAPTER 11 INSTALLATION
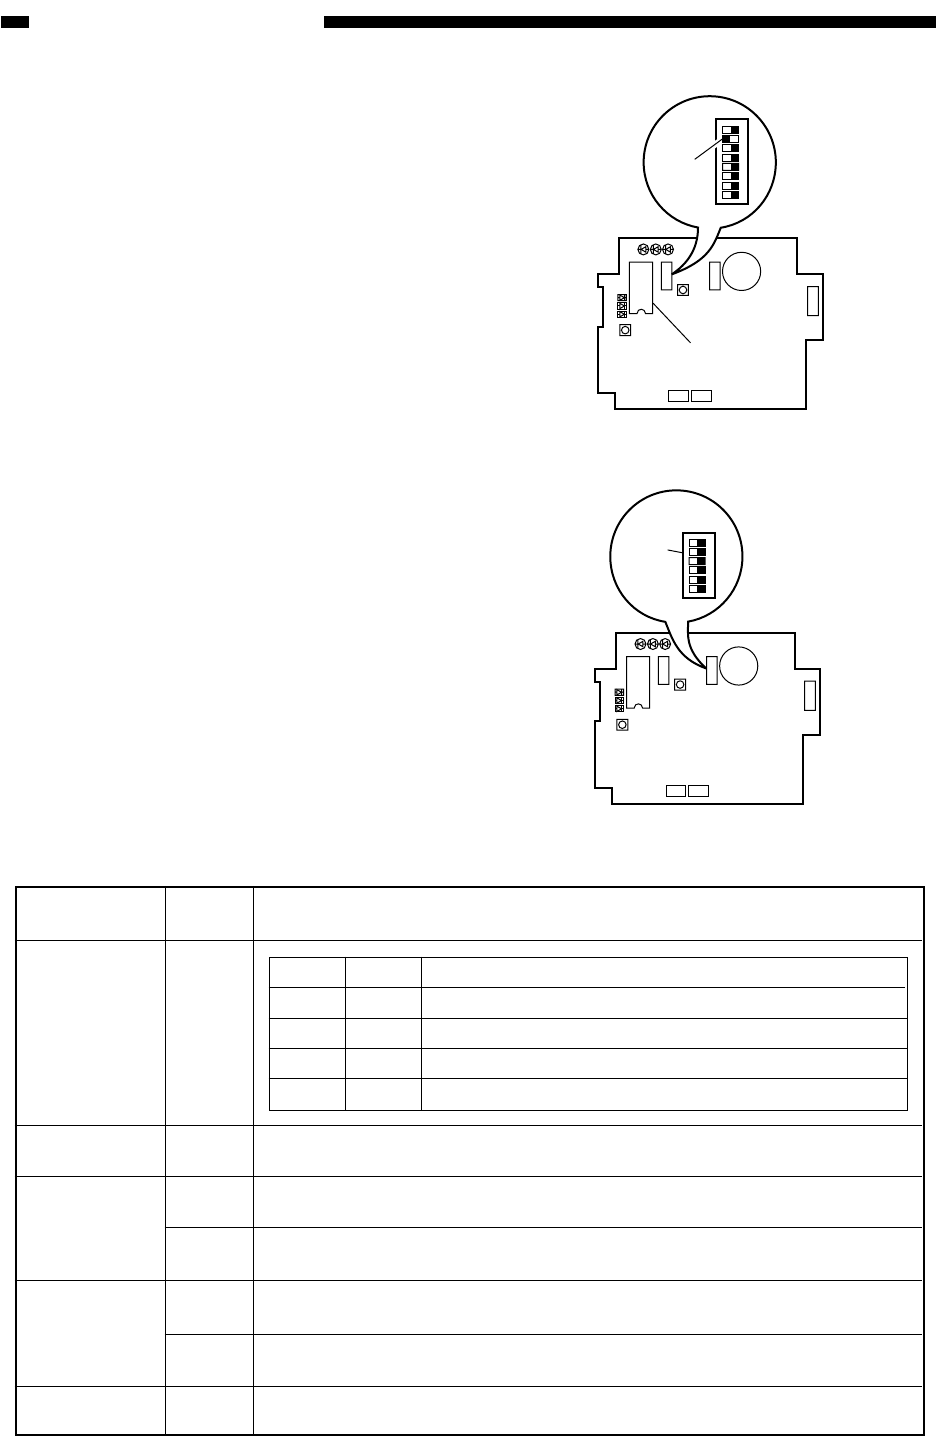
8) If IC6 [11] is mounted on the PCB of the
controller, shift SW2-7 of the DIP switch
[12] to ON; otherwise, shift the bit to
OFF.
Note 1: If the IC6 [11] is not mounted, you
need not mount one.
Note 2: If the ROM (IC6) [15] is mounted or if
you are replacing it, be sure to shift
SW2-7 of the DIP switch [12] to ON.
9) Set the bits of the DIP switch (SW3) [13]
on the PCB of the controller as shown in
Table 11-501.
Figure 11-508
Table 11-501
LED1LED2LED3
2
1
LED5
LED6
LED4
IC6
SW1
SW4
SW3
6
1
BAT1
CN4
1
2
CN3 CN2
12345678
SW2
[12]
[11]
LED1LED2LED3
2
1
LED5
LED6
LED4
IC6
SW1
SW4
SW3
6
1
BAT1
CN4
1
2
CN3 CN2
123456
SW2
[13]
Figure 11-509
Switch
SW3-1
SW3-2
SW3-3
SW3-4
SW3-5
SW3-6
Setting
See
right.
OFF
ON
OFF
ON
OFF
—
Description
SW3-1 SW3-2 Description
OFF OFF Set the modem signal transmission level to -16 dBm.
ON OFF Set the modem signal transmission level to -14 dBm.
OFF ON Set the modem signal transmission level to -12 dBm.
ON ON Set the modem signal transmission level to -10 dBm.
Keep it to OFF at all times.
Sets the line to push pulse.
Sets the line to dial pulse.
Sets the dial pulse speed to 20PPS.
Sets the dial pulse speed to 10PPS.
Not used.


