


High-performance Embedded Workshop 8. Using the Custom Version Control System
REJ10J1837-0100 Rev.1.00 Nov. 16, 2008
143
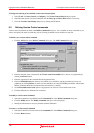
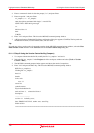
To modify a directory mapping
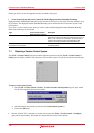
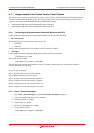
1. Select [Tools -> Version Control -> Configure]. The Version Control Setup dialog box opens. Select the
Projects tab.
2. Select the mapping to be modified from the Version Control Directory Mappings list and then click the
Modify button. The Version Control Directory Mapping dialog box opens.
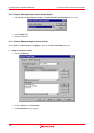
3. Make the necessary changes to the two directories and then click the OK button to confirm the new settings.
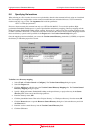
To remove a directory mapping
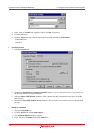
1. Select [Tools -> Version Control -> Configure]. The Version Control Setup dialog box opens. Select the
Projects tab.
2. Select the mapping to be removed from the Version Control Directory Mappings list and then click the
Remove button.
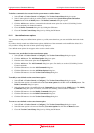
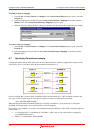
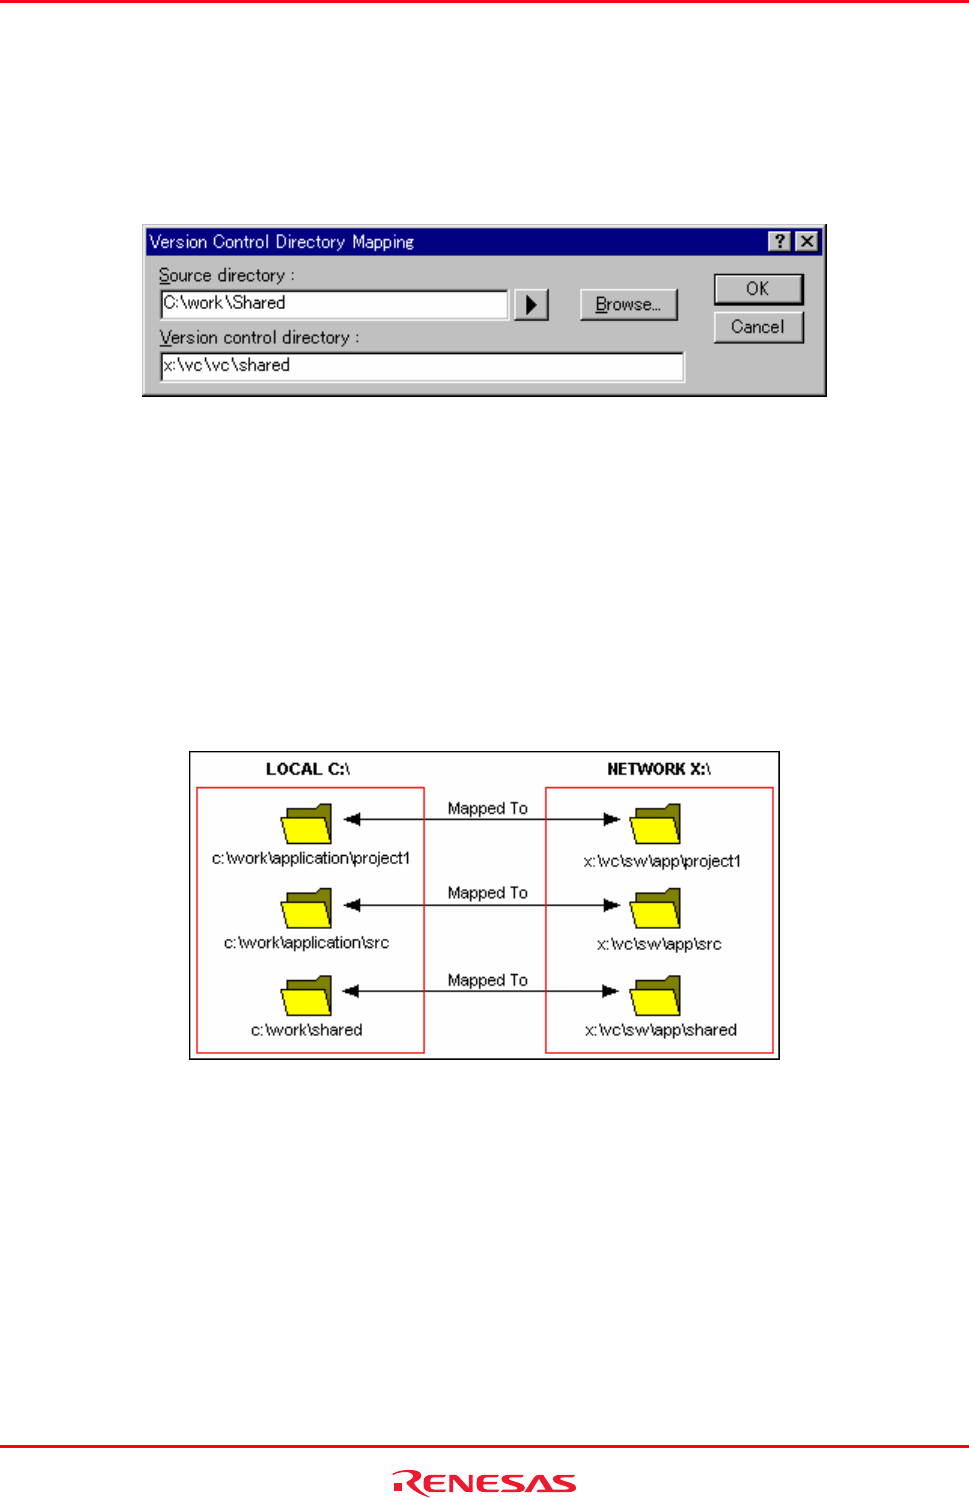
8.7 Specifying file locations example
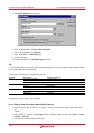
Consider the scenario shown in the figure below. It shows three directories, which are mapped from a shared version
control drive (X:\) to a local drive where the development is being done (C:\).
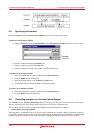
Now let’s imagine that a version control executable has been selected which uses a -GET command to obtain a read-
only copy of a file. In order to get all of the files in a project we need to use the following command:
-GET ‘$(VCDIR)\$(FILENAME)’
When the High-performance Embedded Workshop executes the command for a given project file, it will replace
$(VCDIR) for the equivalent version control directory in the file mapping.
For example, suppose FILE1.C is located at c:\work\application\project1\FILE1.C. If the -GET command is applied to
FILE1.C then:
1. ‘x:\vc\sw\app\project1’ is substituted for ‘$(VCDIR)’, as this is the version control directory mapping for
‘c:\work\application\project1’.
2. ‘FILE1.C’ is substituted for ‘$(FILENAME)’.