


High-performance Embedded Workshop 10. Sharing Projects by Network Facilities
REJ10J1837-0100 Rev.1.00 Nov. 16, 2008
175
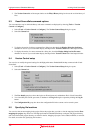
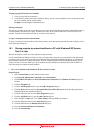
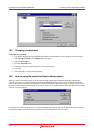
5. Type the new password into both of the fields and click OK.
6. This should set the user and password on the Network tab of Options dialog box.
10.4 Adding new users to the system
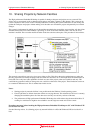
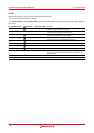
The initial setting of the network database adds an administrator user and a guest user to the system. The following
levels of access are possible in the High-performance Embedded Workshop system:
Administrator Full access to every aspect of High-performance Embedded Workshop. The user can add
and remove users from the projects and change access rights. The administration user
can change the workspace and project files and also the source files.
Full read/write access The workspace and project files can be modified, as can the source files. But it is not
possible to change user access rights from this access level.
Read/write file access Only the source files can be modified. All project settings can only be viewed not
modified.
Read only All source files and project files can only be viewed as read only. Nothing can be
modified.
When any user opens a network-enabled project they must type in their user name and password. Until this is done no
access can be granted. Once entered the user is given one of the levels of access as seen above.
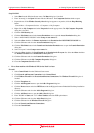
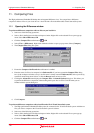
To add a new user to the system
1. Log in with a user who has administrator access rights. The process for doing this is described above.
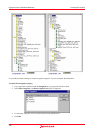
2. Select [Setup -> Options]. The Options dialog box opens.
3. Select the Network tab.
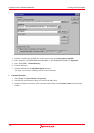
4. Click the Access rights button. The User access rights dialog is displayed.
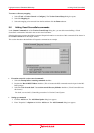
5. Click the Add button. The Add new user dialog box opens. This allows you as the administration user to add
a new log in name and password. Normally the password should be set to some default text or left blank. Then
click OK.
6. Once OK is clicked the user is added with read only rights. To change the access level select the user you wish
to modify and then click the required radio button. Then click OK to save the access rights changes.
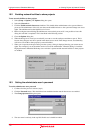
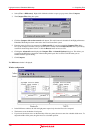
To remove an existing user to the system
1. Log in with a user who has administrator access rights. The process for doing this is described above.
2. Select [Setup -> Options]. The Options dialog box opens.
3. Select the Network tab.
4. Click the Access rights button. The User access rights dialog is displayed.
5. Select the user you wish to remove in the users list.
6. Press the Remove button.
7. Then click OK to save the access rights changes.