


High-performance Embedded Workshop 8. Using the Custom Version Control System
REJ10J1837-0100 Rev.1.00 Nov. 16, 2008
151
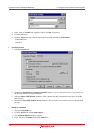
8.11.1.6 Step 6: Using the Version Control facility (Check-out)
Use the check-out command to undo the changes made in the file.
1. Select the file "rcs_sample.c" in the Projects tab of the workspace window and select [Tools -> Version
Control -> Check out].
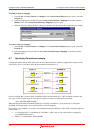
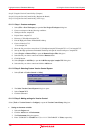
2. The MS-DOS command prompt window appears and shows the result of check-out.
3. Enter "exit" and press the Enter key. This closes the MS-DOS command prompt window.
4. A High-performance Embedded Workshop confirmation dialog box appears. Click Yes. The file has returned
to its original state.
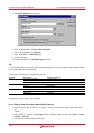
8.11.1.7 Step 7: Using the Version Control facility (View Logs)
Use the log command to view the changes.
1. Select the file "rcs_sample.c" in the Projects tab of the workspace window and select [Tools -> Version
Control -> Log].
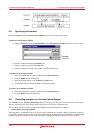
2. The MS-DOS command prompt window appears and shows the log information.
3. Enter "exit" and press the Enter key. This closes the MS-DOS command prompt window.
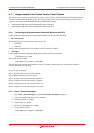
8.11.2 Connecting the High-performance Embedded Workshop with CVS
In this e
xample, the High-performance Embedded Workshop is to be connected with CVS.
• CVS tool environment
The following type of version control system can be used:
o CVS
This procedure assumes that the version control system is located at "C:\cvs-1-11-17".
• Workspace
Create a High-performance Embedded Workshop workspace in the following folder.
C:\WorkSpace\sampleCVS
Then create a folder for CVS.
C:\src\sampleCVS
Note:
In this version control using the High-performance Embedded Workshop and CVS, only versions of source files can be
controlled. It cannot control versions of any other files (such as workspace or project files).
The following pages describe the procedures to create a workspace, make settings for version control, create a
repository, register a module, check-out, check the status, compare, register the result, and view logs.
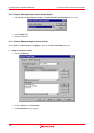
Step 1: Create a workspace
Step 2: Selecting Custom Version Control System
Step 3: Making settings for Version Control
Step 4: Using the Version Control facility (Create a Repository)
Step 5: Using the Version Control facility (Register a Module)
Step 6: Using the Version Control facility (Check-out)
Step 7: Using the Version Control facility (Modify the File)
Step 8: Using the Version Control facility (Check the Status)