


High-performance Embedded Workshop 16. Using the Test Support Facility
REJ10J1837-0100 Rev.1.00 Nov. 16, 2008
235
16.4 Adding tests to the test suite
Once your test suite has been created the next step is to add some tests. This operation allows you to access the Modify
Test Suite dialog box and will allow you to add tests which will then be executable.
To add tests to a test suite
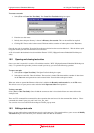
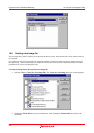
1. Select [Test -> Edit Test Suite]. The Modify Test Suite is then displayed.
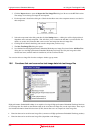
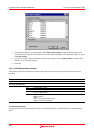
2. Click Add. The Add New Test dialog box is displayed.
To add a new test you should setup the following data
1. Enter the test name. There can be no spaces in this name.
2. Enter the test description. This should describe the test in a verbose way so you will understand it at a later
date.
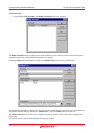
3. To setup the actual tests to execute you should click the Add button.
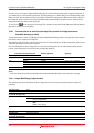
4. The Add New Test Script dialog box is displayed (See below).
5. The Script type box allows you to select a High-performance Embedded Workshop macro ("HEW macro") or
a High-performance Embedded Workshop command line batch file ("TCL command line batch file").
6. Selecting HEW Macro in the Script type drop-down list shows all of the registered macro in the Select
macros to add to test list.
7. You can select multiple macro files to be executed for each test. This is achieved by selecting the checkbox
next to the macro names you wish to use.
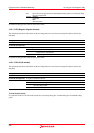
8. Selecting "TCL command line batch file" in the drop-down list changes the Add Test Script dialog box so
you can define the file to execute when the test is executed.
9. Clicking OK stores the results and adds it to the Add New Test dialog box.
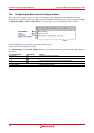
10. Finally you must set the Debug system for test image comparison file. This file stores the comparison data
for the system to be compared to after the tests have executed. This file can be created by using [Test ->
Create Test Image File].
11. Clicking OK adds the test to the Modify Test Suite dialog box.