


High-performance Embedded Workshop 9. Using Visual SourceSafe
REJ10J1837-0100 Rev.1.00 Nov. 16, 2008
161
9.2.1 Adding files to Visual SourceSafe
In the previous section, a mapping between the workspace directory on your hard disk (i.e. the working directory) and
the project directory in Visual SourceSafe (i.e. the directory controlled by Visual SourceSafe) has been established.
However, the project directory (and any subdirectories) on your hard disk may contain many source files, whereas the
directory it is mapped to in Visual SourceSafe will be initially empty.
You need to add files to the Visual SourceSafe project.
To add files to Visual SourceSafe
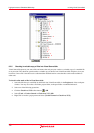
1. Select the files that you would like to add to Visual SourceSafe, in the Projects tab of the workspace window.
You may also select a file folder, project folder, workspace folder or combination thereof. When selecting the
project or workspace folder, the High-performance Embedded Workshop system files will be added to the
selected file list. For example, selecting the project folder will also add the project file (.HWP) to the Files list.
If the project file is then checked out and the version is newer than when it was last loaded, you will be asked
whether you want to reload the project.
2. Select one of the following operations:
• Click the Add to VCS toolbar button (
), OR
• Select [Tools -> Version Control -> Add to VCS], OR
• Right-click to invoke a pop-up menu and select [Version Control -> Add to VCS].
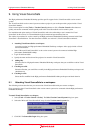
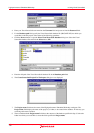
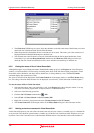
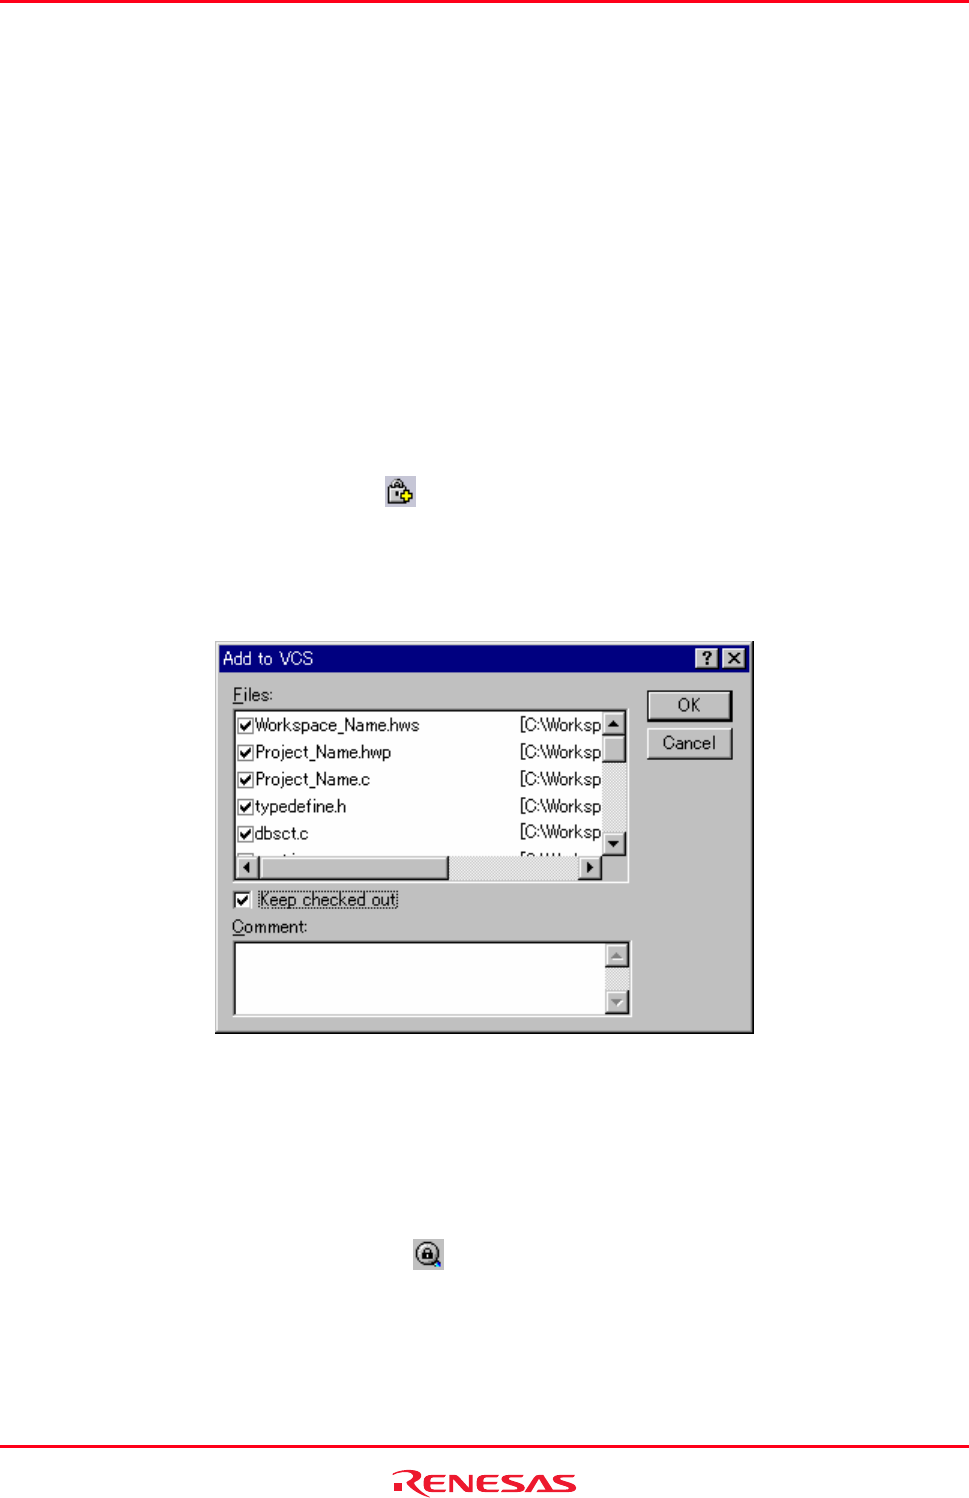
3. The Add to VCS dialog box opens. Select the checkbox on the left to the name of the file that you wish to add
and click the OK button.
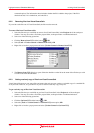
When you add files to Visual SourceSafe, the local versions in your working directory will become read-only. If you
select the Keep checked out checkbox in the Add to VCS dialog box before you check the files into Visual
SourceSafe, these files can be writable even when they are added. To check that the Add to VCS operation was carried
out as you expected, or to quickly review the status of all of the files in a project:
1. Select the project folder whose files you want to check, in the Projects tab of the workspace window.
2. Select one of the following operations:
• Click the Get VCS status toolbar button (
), OR
• Select [Tools -> Version Control -> Get VCS status], OR
• Right-click the selected item to invoke a pop-up menu and select [Version Control -> Get VCS status].
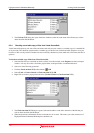
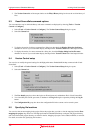
3. The status of each file will be displayed in the Version Control tab of the output window, or the File(s) Status
dialog box. For setting of location where the status is to be displayed, see section 9.3, Visual SourceSafe