


High-performance Embedded Workshop 8. Using the Custom Version Control System
REJ10J1837-0100 Rev.1.00 Nov. 16, 2008
152
Step 9: Using the Version Control facility (Compare)
Step 10: Using the Version Control facility (Register the Result)
Step 11: Using the Version Control facility (View Logs)
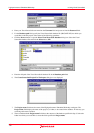
8.11.2.1 Step 1: Create a workspace
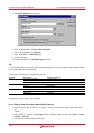
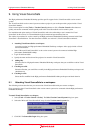
1. Select [File -> New Workspace] to open the New Project Workspace dialog box.
2. Create a workspace with the following conditions.
• Workspace Name: sampleCVS
• Project Name: sampleCVS
• Directory: C:\WorkSpace\sampleCVS
3. Exit the High-performance Embedded Workshop.
4. Create a folder for CVS.
C:\src\sampleCVS
5. Move the file you wish to control from "C:\WorkSpace\sampleCVS\sampleCVS" to "C:\src\sampleCVS".
6. Start up the High-performance Embedded Workshop and open the created workspace "sampleCVS".
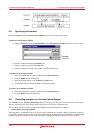
7. Select [Project -> Remove Files] to open the Remove Project Files dialog box.
8. Select the file you wish to control and click the Remove button.
9. Click OK button.
10. Select [Project -> Add Files] to open the Add files to project 'sampleCVS' dialog box.
11. Select the file you wish to control and click the Add button.
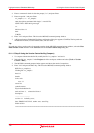
8.11.2.2 Step 2: Selecting Custom Version Control System
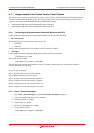
1. Select [Tools -> Version Control -> Select].
2. The Select Version Control System dialog box opens.
3. Select Custom VCS.
4. Click the OK button.
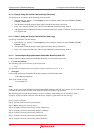
8.11.2.3 Step 3: Making settings for Version Control
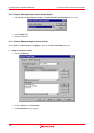
Select [Tools -> Version Control -> Configure] to open the Version Control Setup dialog box.
• Setting environment variables
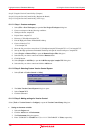
1. Select the Projects tab.
2. Click the Add button on Environment.
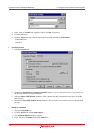
3. The Environment dialog box appears.
4. Enter "CVSROOT" in Variable and "C:\cvs-1-11-17\DATABASE" in Value, respectively.